Temperamental Forklifts

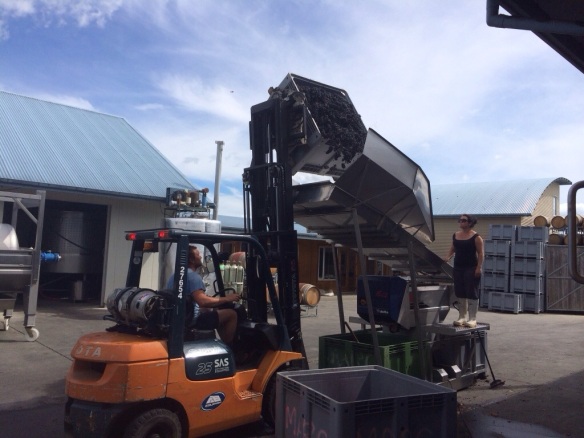
One of the two forklifts at the winery is a bit tricky. Both the forklifts are powered by compressed natural gas, so they’re a bit louder than the electric ones, and one of them (the yellow one) stalls if the revs get too low. This can be especially frustrating when you’re in a tight space like the barrel hall and you’re trying to maneuver the thing backwards without knocking into anything (aka slowly and carefully). It also can be a bit of a pain to start. Our winemaker insists she just needs a bit of coaxing, especially first thing in the morning.

I got my NZ forklift certification on Wednesday and since then I’ve been spending a fair bit of time on both the forklifts, as well as sorting fruit, cleaning and sulfuring barrels, cleaning tanks, and running lab work. Harvest has officially started.

20140322-143943.jpg

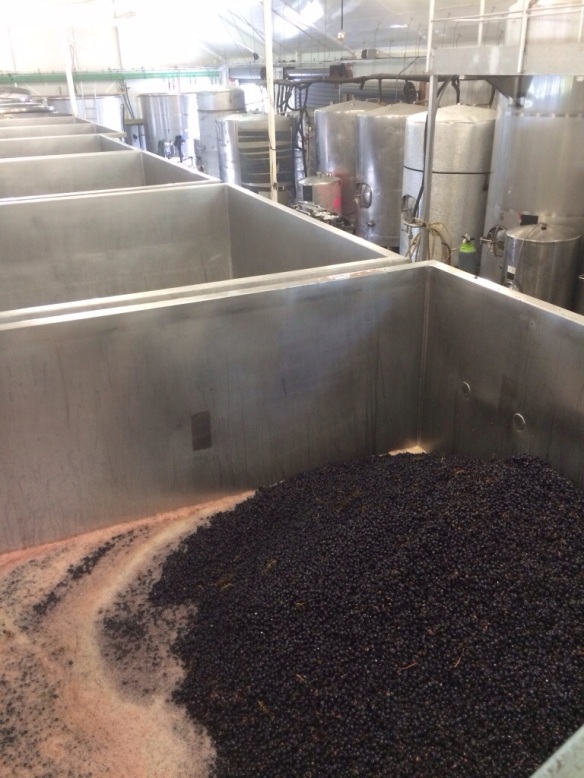
The sorting table here is off the ground, so we tip the fruit onto it using the big orange forklift, then use a rake to bring the fruit down in a single layer. At the bottom of the table, it goes through a destemmer and then into bins. The bins are sulfured and moved into a chiller to cool down before being taken inside and tipped into a tank.

20140322-144158.jpg

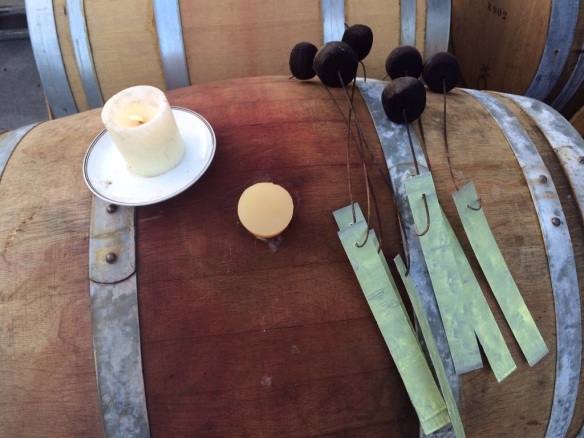
Yesterday I spent some time sulfuring barrels, which involves lighting quite a pretty piece of paper on fire and putting it into the barrel to burn.

20140322-144326.jpg

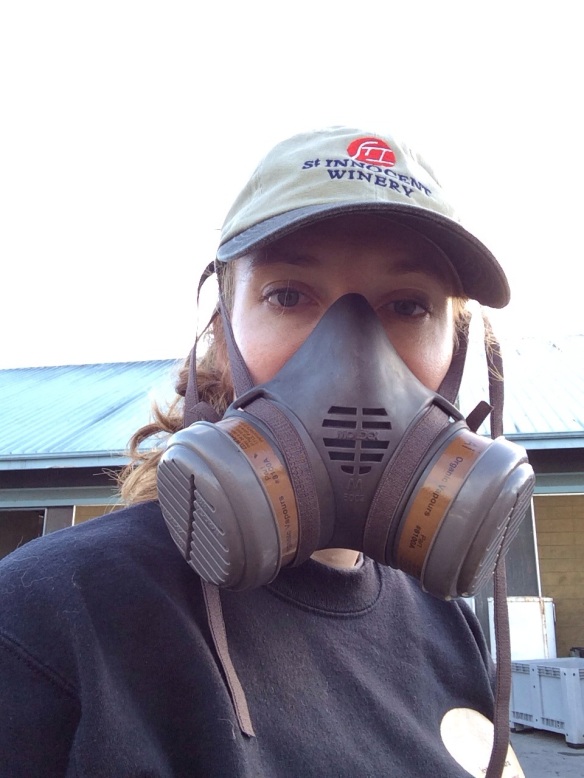
They look a bit like incense, but don’t be fooled. These guys pack a punch. Don’t worry, Mom–I was wearing proper safety gear.

20140322-144452.jpg

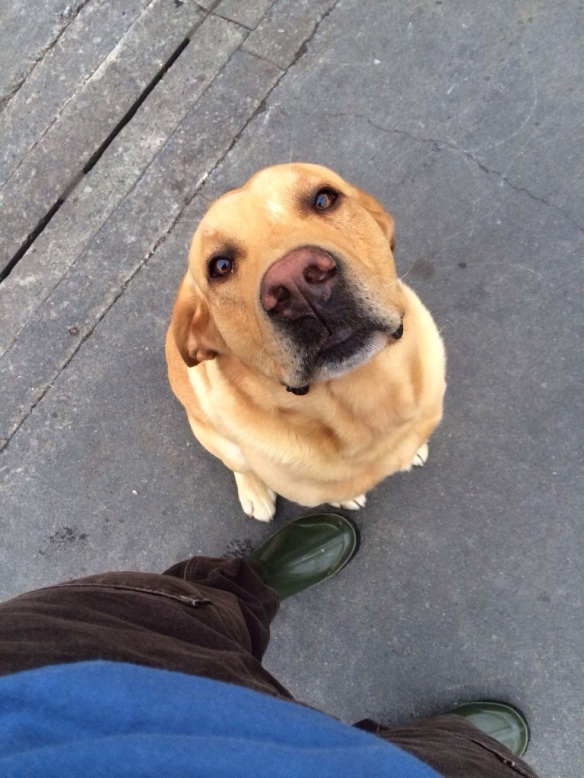
I’ve been getting some good runs in while I’m here. It’s really a beautiful country. I’m also starting to make some two-legged friends, as well as a few more four-legged ones. Since I didn’t have a picture of the other winery dog, Bede, to include in my last post, here’s a gratuitous cute dog shot:

20140322-144759.jpg

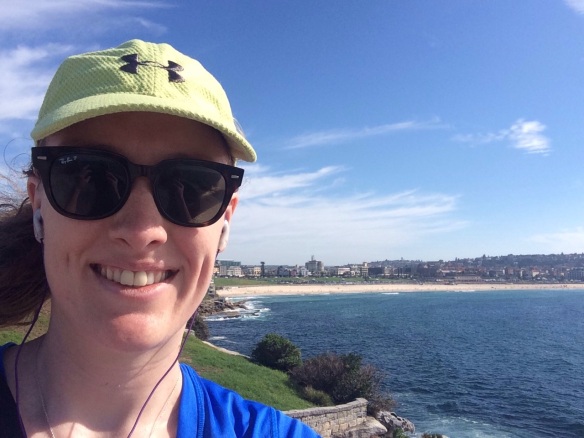
That’s all for now! Enjoy this picture that I took while out for a morning run day before yesterday.

20140322-144853.jpg

Four Legged Friends

I’ve often found it easier to make friends of the four legged persuasion rather than the two legged. I’ve made several of these sorts of acquaintances since I’ve arrived in New Zealand.

First there was Oliver (Ollie), the cat belonging to the Winemaker I’m working for here in New Zealand. I met him when I got in late Saturday night.

20140318-204049.jpg

On Sunday I got settled into my accommodations here in town. I’m staying with a lovely woman named Marquita who has a fabulous cat named Gypsy. Gypsy has decided that we’re friends and has taken to grooming me when she gets a chance. She’s currently watching me type this.

20140318-204243.jpg

I started at the winery on Monday and so far I’m really enjoying it. Everyone I work with is great and although there are a few things to get used to (such as the fittings–no triclovers here!), I think it’s going to be a good fit.

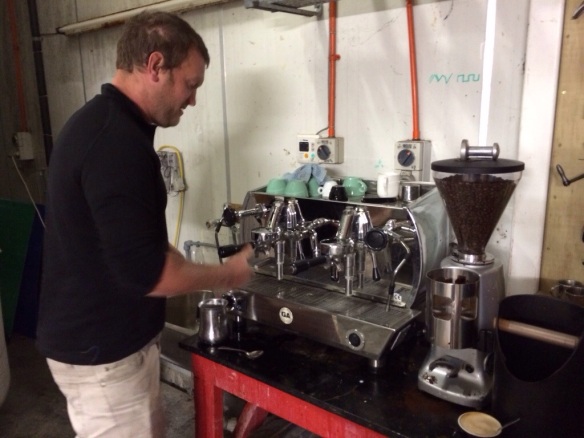
One of the perks of the job is that we have our own commercial espresso machine for harvest. My first orientation to the winery was learning how to use it. By the time I get back to the states I’ll be a full fledged barista!

20140318-204602.jpg

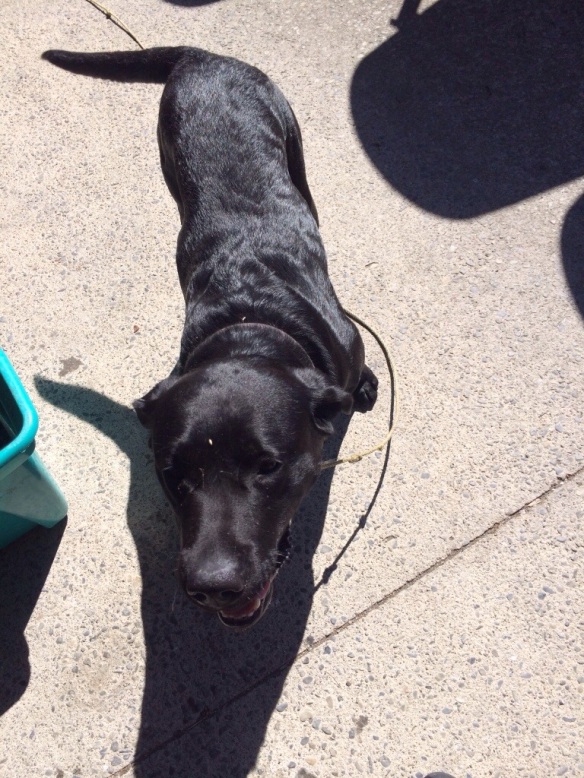
And yes, there are four legged friends at the winery as well. This is Winston:

20140318-204738.jpg

Still working on making friends of the two-legged variety. One of these evenings I plan on venturing into town to have a drink at the local pub and hopefully meet some people. Until then, at least I have a cat to snuggle.

Martinborough

One thing you don’t generally think about when you’re traveling: luggage allowances vary dramatically. I had to do some clever repacking when I got to the Sydney airport yesterday. Luckily I made it on the plane with all my stuff.

Unfortunately, once on the plane the captain informed us that a thunderstorm had begun and the whole airport was shut down. We were on the Tarmac for about 40 minutes before we took off. Yikes!

I didn’t mention this about my flight over, but I was reminded of on my flight to NZ how impressed I was with the airplane food on Qantas. They give you two choices, it’s edible, they have actual glass cups, and they offer wine, beer, and spirits complimentary along with the soft drinks. Plus, they served dinner on my flight to Martinborough even though it was only 2.5 hours. Awesome.

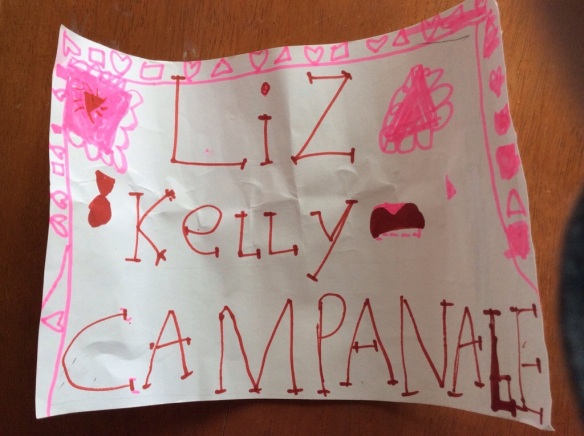
I got through customs and the winemaker for Martinborough Vineyard, Paul, was waiting for me at the gate. I got to meet his wife and kids right off the bat as we’ll since it turns out they’d been at a party in Wellington that night. The kids had made me a very sweet sign (that got left at home, but I got to see it when we got back to Martinborough.)

20140316-082731.jpg

They were kind enough to let me stay at their house for the night since it was so late, so I will be seeing the place I’ll be staying for the duration later today. For now, I’ve had a cup of tea and some toast with Marmite and I’m experiencing the wonders of Kiwi kids tv. Verdict: just as crazy as American kids TV.

Sydney in 36 Hours

Sydney is a beautiful city! I made the most of my time here, but I’d love to come back sometime and get to experience it with Kris.

My flight got in Friday, March 14 at 8:30 am local time. The first order of business was convincing customs not to charge me for the 1/2 case of wine I’m bringing to NZ. I succeeded thanks to a copy of my itinerary and a very kind customs agent.

Next up, I needed to stash my luggage, since I just needed my carry on and didn’t want to bring the rest into the city with me. After wandering around a bit, I found a set of lockers and got that sorted. An Australian SIM card for my cell and a couple of texts to let everyone know I had arrived safely and I was on my way into the city.

Sydney airport is only about 20 minutes from the city center, so it’s quite convenient. I got to my hostel near Kings Cross (basically the Times Square of Sydney), changed my clothes and stowed my bags, then went off to explore.

First stop: The Botanic Gardens. Sydney has a lovely garden, free to the public and well worth a stroll. They have signs everywhere that say things like “Please walk on the grass! These are your gardens and we want you to enjoy them!”

From the gardens, I got my first view of Circular Quay and the iconic Opera House and Harbour Bridge:

20140315-163359.jpg

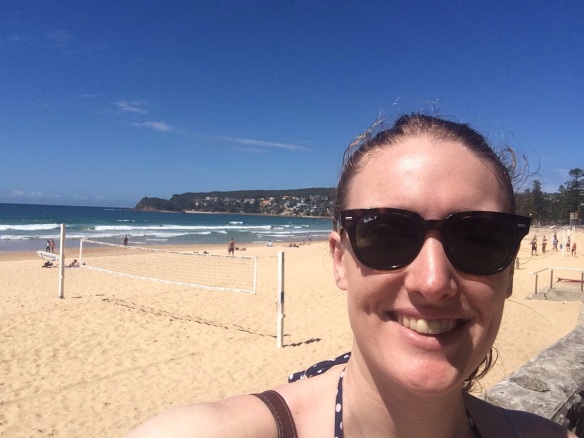
I walked over there and took the obligatory selfie:

20140315-163553.jpg

I then hopped on a ferry and headed over to Manly Beach. It was a gorgeous day and you couldn’t beat the views on the way over.

20140315-164046.jpg

20140315-164018.jpg

Manly itself was beautiful as well. I took a stroll along the water:

20140315-164422.jpg

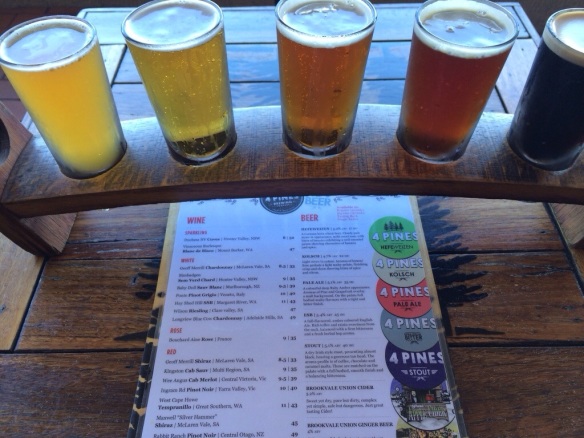
then headed to the local microbrewery to get some lunch (and by lunch I mean beer). This was my first real introduction into how expensive Sydney is–about twice as much as Portland! It was $9.50 for a pint of beer or $15 for the sampler!

20140315-164540.jpg

After lunch I headed back to the hostel and cleaned up a bit, then met family friends Larry and Simon for dinner over in Newtown. They were so hospitable and we had a lovely time at dinner. Unfortunately, I am the worst so I forgot to document the moment.

I crashed about 9:30 and apparently missed quite the happening bar scene in Kings Cross. One girl in my dorm was just getting back as I was getting ready to go around 6:30 this morning.

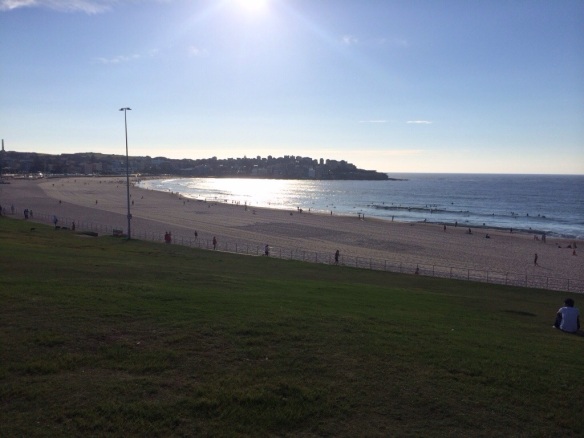
Today I headed over to Bondi to experience the most famous beach in the world. I took a quick detour to experience the Sydney coffee scene and the “flat white” made me miss my coffee dates at Barista with Kris:

20140315-164122.jpg

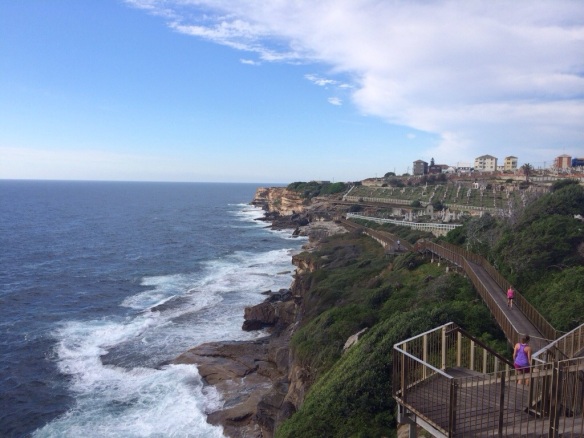
Bondi was gorgeous! They have a trail that runs all along the coastline so I took a few hours to go hiking and it was well worth it–just stunning.

20140315-164145.jpg

20140315-164139.jpg

20140315-164153.jpg

After that I swam a bit (don’t worry, Mom, I didn’t get sunburned) and headed back to Sydney to get my stuff together and head to the airport. My flight is boarding in a few minutes, so my next post will be from New Zealand.

Cheers!

Day One

As promised to several of you, I’ll be updating with the goings on while I’m down under. Sorry blog that I abandoned! Looks like you’ll be getting some use after all.

Thoughts from the plane…

This is absolutely the longest flight I’ve ever been on.

I left Portland yesterday morning with a tearful goodbye to Kris at the airport and spent a lovely afternoon with my parents in Los Angeles. I got to go say hi to Pam and many of my former coworkers at Fox then have a lovely farewell dinner with my godfather. He insisted on a selfie.

My flight left LAX at 11:55 pm, which means we started boarding at 11:10. It’s amazing how many people can fit on a 747. Also amazing that they can keep it in the air for nearly 15 hours.

I managed to stay up for the first 4 hours or so of the flight then get some decent sleep, so I feel pretty well adjusted to Sydney time. Really, the only down side is that the in seat headphones only worked on the right side. Kris, thank you for setting my iPad up with movies. It was a huge help.

I still have a lot of unknowns about where I’ll be staying once I get to NZ tomorrow, but I’m going with the “I’ll figure it out” mentality, which has always worked for me in the past. Right now I’m more concerned with getting the Australian customs agents to not charge me duty on the wine I’m bringing to NZ. We’ll see it they have mercy.

I miss everyone at home already, but I’m excited for my big adventure down under. Cheers, mates!

New Year’s Resolutions

I really meant to keep up the blog.  Really I did.

Then life happened.

I got a promotion at work, which meant I was working full rather than part time and still going to school, so things fell by the wayside a bit.  But I’m back baby!  Sorry for the long absence.  I’m still working and going to school, but things have calmed down a bit, so hopefully I’ll be able to keep up the blog.  If not, mea culpa.

I have two new year’s resolutions this year: keep the house cleaner and go dancing once a week.

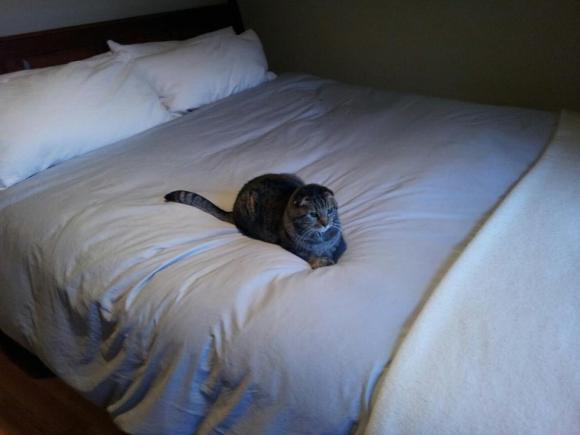
On the house cleaning front, I have created a comprehensive chore list and programmed it into my and my husband’s google calendars.  We each have light morning chores–I make the bed, he puts a load of laundry in the washer, we each wipe down a bathroom sink and toilet, he feeds the cats, and I feed the chickens and collect eggs.  In the evenings he puts the laundry in the dryer, I fold it, we clean up the kitchen together, and we each declutter one of the main living spaces.  On top of that, we each do one weekly chore per day (we trade off every week).  So far I’ve managed to keep up with it–our bed hasn’t been made this often since…umm…ever.  This morning I even managed to do it with a cat on top!

Image

As far as dancing once a week, I’m planning to go on Tuesday.  I miss it and I am sorely out of practice, so hopefully I’ll make the time to keep going!

On the food front, I made really really good pulled pork in the crockpot today.  With our busy schedules, I am going to need to utilize that appliance way more often.

If I knew you were coming, I’d have baked a cake.

OH WAIT. I did.

My friend Claire came to visit for her 30th birthday a couple weeks ago. I love birthdays because it means an opportunity for me to bake a cake. For this illustrious event, I decided to make one of my favorites, dark chocolate layer cake soaked with kahlua, filled and frosted with dark chocolate ganache.

This cake is decadent. A thin slice is plenty and it goes perfectly with a scoop of vanilla ice cream. What really makes this cake for me is a technique I learned in a cake decorating class I took. The trick is using fishing line, sewing thread, or dental floss to cut the cake layers in half, so you get twice as many. This means twice as much filling, which is awesome. To do this, you score the cake evenly around the side, put the string in the groove, and then cross it and pull it through until it slices the layer into two even layers.
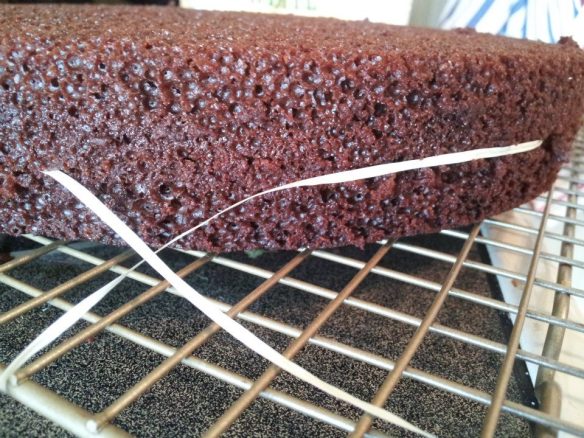
The next step is to soak the first layer in Kahlua using a pastry brush.  This does a couple of things.  It acts as a crumb coat, which basically means it brushes off the crumbs (or adheres them to the cake), allowing the filling to go on more smoothly.  It also gives the cake some extra moisture and enhances the dark chocolate/coffee flavor it already has.
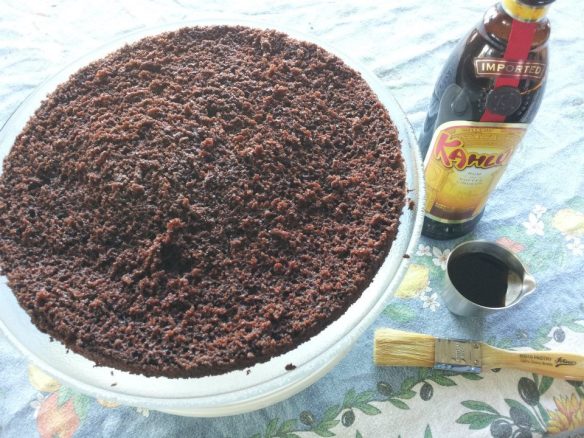
Next spread the ganache over the first layer that you have soaked with the Kahlua.
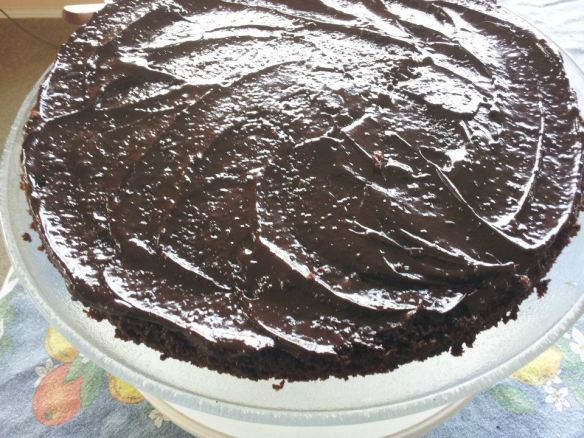
Put the second layer on and repeat.  Once you have the fourth layer on, soak it in the Kahlua.  Now you’re ready to frost.
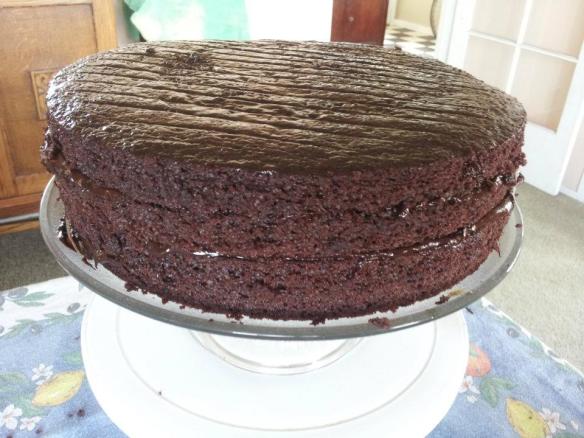
I do my frosting on a turntable.  They aren’t super expensive, and if you do much frosting, they are definitely the way to go.  You can stick your cake stand/plate/whatever right on top of it and stay in one place as you turn the stand.  Once you’ve frosted, you end up with a lovely cake, and the four layers inside look super impressive (ignore the frosting I got on the tablecloth!)
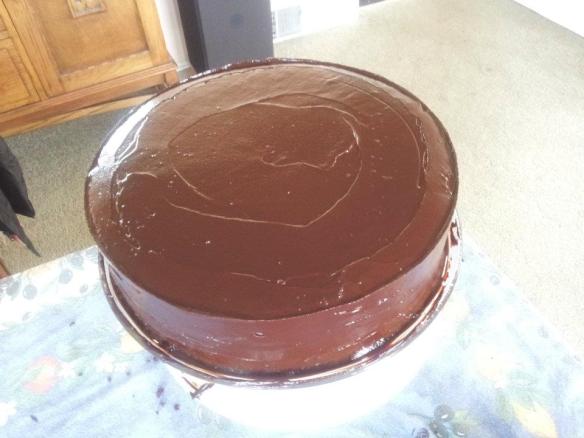
Chocolate Kahlua Cake (adapted from Double Chocolate Layer Cake at Epicurious)

Serves 12 to 14

Ingredients
For cake layers
3 ounces fine-quality semisweet chocolate (I use the pound plus chocolate from Trader Joes)
1 1/2 cups hot coffee
3 cups sugar
2 1/2 cups all-purpose flour
1 1/2 cups unsweetened cocoa powder (not Dutch process)
2 teaspoons baking soda
3/4 teaspoon baking powder
1 1/4 teaspoons salt
3 large eggs
3/4 cup vegetable oil
1 1/2 cups well-shaken buttermilk
3/4 teaspoon vanillaFor ganache frosting
1 pound fine-quality semisweet chocolate
1 cup heavy cream
2 tablespoons sugar
2 tablespoons light corn syrup (I have made it with and without the corn syrup and I don’t really think it makes a difference, but if it’s important to you, go for it)
1/2 stick (1/4 cup) unsalted butter

OPTIONAL: 3-4 tablespoons Kahlua
For crumb coat
4 – 6 oz. Kahlua
Special equipment
two 10- by 2-inch round cake pans

Directions

Make cake layers:
Preheat oven to 300°F and grease pans. Line bottoms with rounds of parchment paper and grease paper.Finely chop chocolate and in a bowl combine with hot coffee. Let mixture stand, stirring occasionally, until chocolate is melted and mixture is smooth.

[NOTE: I hate chopping chocolate.  I think it’s a pain in the patootie.  Usually I skip that and just put the coffee and chocolate together in a bowl over some boiling water until it’s all melted.  It’s worked fine for me.]

Into a large bowl sift together sugar, flour, cocoa powder, baking soda, baking powder, and salt. In another large bowl with an electric mixer beat eggs until thickened slightly and lemon colored (about 3 minutes with a standing mixer or 5 minutes with a hand-held mixer). Slowly add oil, buttermilk, vanilla, and melted chocolate mixture to eggs, beating until combined well. Add sugar mixture and beat on medium speed until just combined well. Divide batter between pans and bake in middle of oven until a tester inserted in center comes out clean, 1 hour to 1 hour and 10 minutes.

Cool layers completely in pans on racks. Run a thin knife around edges of pans and invert layers onto racks. Carefully remove parchment paper and cool layers completely. Cake layers may be made 1 day ahead and kept, wrapped well in plastic wrap, at room temperature.

Make frosting:
Finely chop chocolate. In a 1 1/2- to 2-quart saucepan bring cream, sugar, and corn syrup (if using) to a boil over moderately low heat, whisking until sugar is dissolved. Remove pan from heat and add chocolate, whisking until chocolate is melted.

[Note: Really the same note as before, I did this using a double-boiler method and it worked fine.  If you want to be a purist, that’s okay too, but I am lazy. If you do that, still remove it from the heat before you add the butter.]

Cut butter into pieces and add to frosting, whisking until smooth.  Add Kahlua, if using.

Transfer frosting to a bowl and cool, stirring occasionally, until spreadable (depending on chocolate used, it may be necessary to chill frosting to spreadable consistency).

Cut cake layers in two using string method.  Soak each layer in Kahlua using a pastry brush and cover with chocolate ganache before topping with next layer.  Frost once all layers are on the cake.

Cake keeps, covered and chilled, 3 days. Bring cake to room temperature before serving.

Getting back into the swing of things…

The last few weeks have been crazy!

First I had finals week.  Let me just say that going back to school as an adult feels very odd.  It’s one thing to have finals week when you’re 18, but when you’re 28 it feels strange to say it.  Regardless, finals went well.  Straight As in all my classes!

Then came Spring Break (another oddity), which I was expecting to use to get caught up on blogging, gardening, organizing my house, etc.  Unfortunately nature had other plans for me inasmuch as I caught the PLAGUE.  I very rarely get sick but when I do it hits me like a ton of bricks.  This time was no exception.  In all of this, I was also working 3 days a week, so blogging kind of fell by the wayside.

I did manage to accomplish some projects, though!

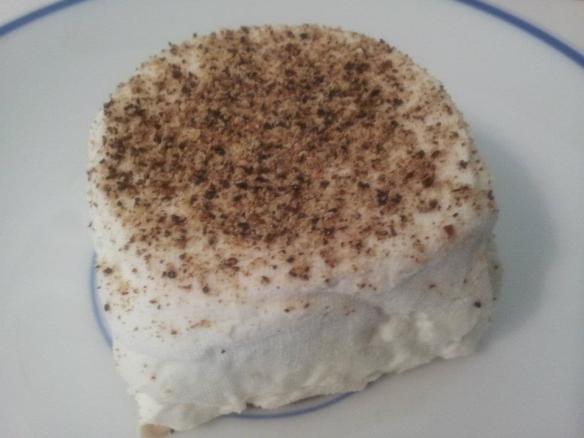
First up, to continue the UFH challenge theme for the month, I made chevre (that’s pepper on the top, in case you’re wondering):

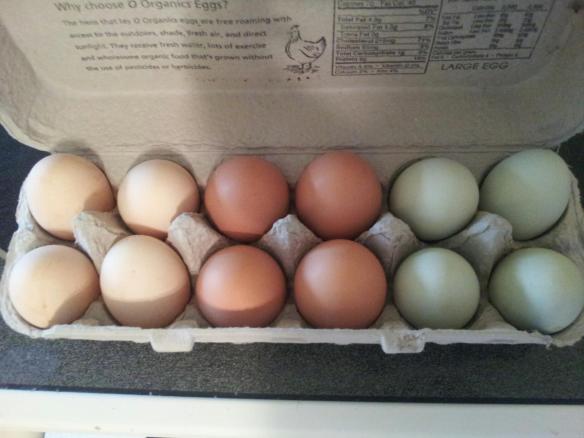
On the gardening front, I got two of our beds tilled and amended with compost (aka chicken poop!) and gypsum.  The chickens had a field day out there with me looking for worms.  My husband moved a lot of our shrubs to other spots in the yard to make room for the vegetables I want to plant.  We also put in some raspberry bushes that we still need to trellis.  I’m a little nervous about putting in berries, since we have an entire hill of blackberries behind our house that we have to attack every year with machetes, but he really wanted them.  Hopefully with the trellising they won’t get too out of control.  More on the yard in another post.  Speaking of the chickens, though, look at the gorgeous eggs they’ve been laying!

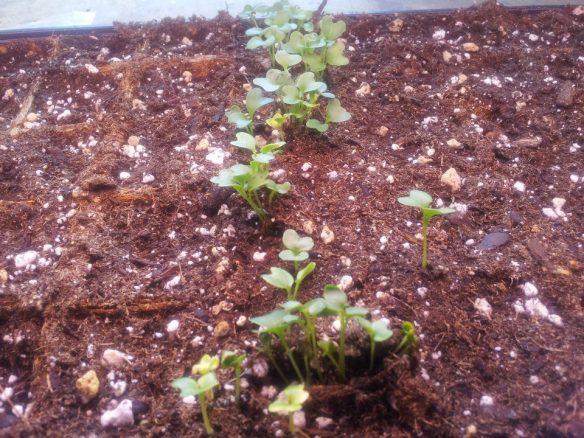
Also, I finally managed to get my seeds started for the year!

My set up is certainly not state of the art (unless you consider old paint cans state ofart), but it works.  I already have some sprouts coming up: peas, kale, and onions!

A couple of ideas for all that chile verde.

I mentioned in my last post that we’ve been using the chile verde I made for all sorts of things.  My husband and I often have a lot going on, so sometimes we don’t have time to do a ton of cooking.  Because of this, we often make up dishes that we can use throughout the week.  I thought I’d do a quick post to show you some options for chile verde (or other taco meat dishes like carnitas or barbaracoa).  First up?  Breakfast!
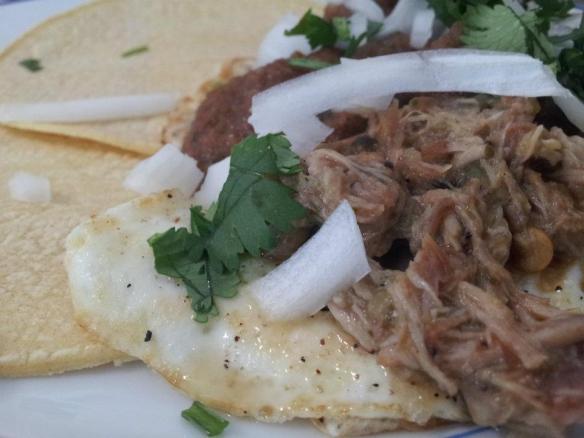
Breakfast: Chile Verde Huevos Rancheros

A love of breakfast totally runs in my family.  My dad makes awesome breakfasts and my sisters and I are all huge fans of the meal, especially when eggs are involved.  One of my favorite egg breakfasts is huevos rancheros.  This is basically just fried eggs (usually either sunny side up or over easy) put on tortillas and topped with salsa.  It is often served with a side of beans.  One reason this dish is so awesome is that you can dress it up or down using basically whatever you have on hand.  This morning i didn’t have beans, but I did have chile verde and some homemade tomato salsa.

Om nom nom.  Delicious!  Plus, this dish is super easy to make.  You literally just throw it together and eat it.  I topped my overeasy eggs with some chile verde, salsa, onion and cilantro, and devoured it with a couple of corn tortillas.  It took all of 5 minutes to make, making this a perfect weekday breakfast.  Add a side of black beans and a bloody mary, and you are in prime brunch territory.

Lunch: Taco Time!

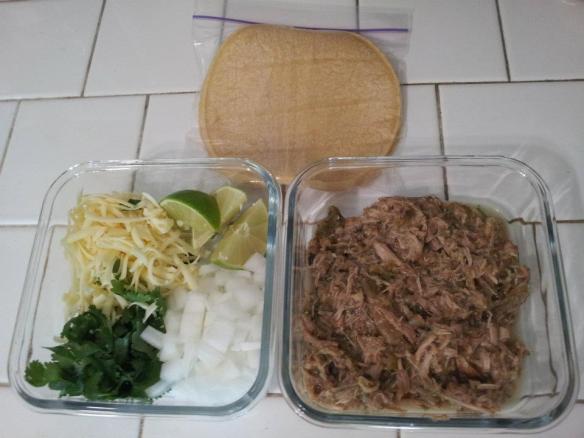
The difficult thing about street style tacos is that they pretty much have to be eaten right when they are made.  Otherwise the tortilla gets soggy and the onion just overpowers everything.  The solution?  Pack everything separately!
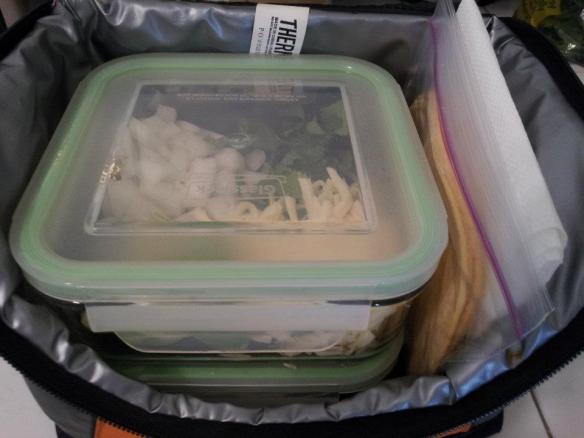
The toppings I like to use are chopped white onion, chopped cilantro, shredded jack cheese, and some fresh lime wedges.  Other options could be chopped fresh jalapenos, pico de gallo, etc.  We have glass containers with plastic lids that we use for lunches, but as long as you can microwave the container containing the pork (or you don’t mind munching on it cold), you could use whatever you have.  Another option that might work better for school kids or those who don’t have access to a microwave at lunch time is to pack the pork in a thermos so it stays hot.

The beauty of this system is that you can do it in a couple of ways.  You can make individual tacos and put the toppings on them as you eat them, or you can put the toppings onto the pork and eat it out of the container, using the tortillas more like a side.  You could also pack a larger flour tortilla and include some beans and/or rice and voila: burrito time!  The modular system is one of my favorite ways to pack lunches because it can be done ahead without things getting mushy.

If you have enough containers and/or room in your fridge, you could even pack several days worth and just fill your lunch box morning of.  Easy peasy.  Don’t forget to include a napkin and a fork!

Chilly Weather = Chile Weather!

Back in the day, I was a vegetarian for 6 or 7 years.  Then one day I was at a farmer’s market in Walla Walla, Washington with one of my best friends and she told me that she was eating the best thing she had ever tasted.  That thing was a freshly made pork sausage with sweet onions, all locally sourced.  I took a bite and declared that I was no longer a vegetarian.

My point is that if there was ever a reason for eating meat, it’s pork.  Pork is delicious!  It is also incredibly versatile, running the gamut from decadently fatty bacon (which I like to think of as the candy of meats) to lean and healthy tenderloin.  The tenderloin does get less healthy when you wrap it in bacon like I usually do, but that is beside the point.   I still eat vegetarian a good chunk of the time (because vegetables are awesome), but every once in a while pork really sounds good.  And by every once in a while I mean this week.

I had about 3.5 pounds of pork tenderloin in my freezer that needed to be used and when my husband said he was in the mood for Mexican food, I hit upon the perfect solution: chile verde.  Chile verde is basically a stew with pork, various peppers, garlic, and tomatillos.  It can be eaten straight up in stew form or used as a taco filling.  It is also a perfect slow cooker recipe.

I used this recipe from the Food Network as the basis for my chile verde, although I made a few alterations.  For one thing, I love the flavor of roasted chiles, so I roasted all the peppers along with the tomatillos.  I took before and after pictures of this but then accidentally deleted them from my camera.  Doh!  It was pretty straightforward, though.  I just cut all the peppers into chunks and threw them under the broiler on a sheet pan.  Another alteration I made was whirring the tomatillos in the food processor rather than chopping them.  Also, after I sauteed the vegetables I deglazed the pan with tequila.  Then everything went into the crock pot.

I set it for 3 hours on high, but you could also set it for ~6-8 hours on low and it would work fine.  At this point you could call it done and serve it as a stew.  We wanted it for tacos, however, so I strained out the solids using a colander.

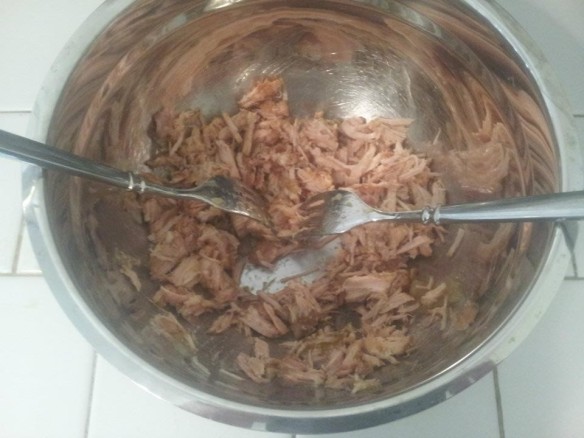
Then I pulled out all the pork pieces and shredded them using two forks.

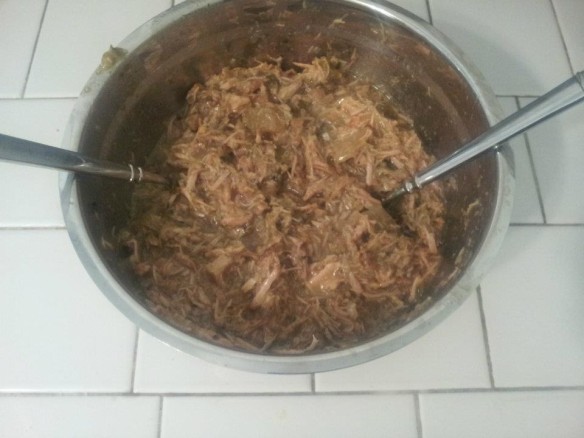
Once all the pork was shredded, the peppers and onions got added back in.  I also added a little of the broth to give it some moisture (I reserved the rest of the broth for tortilla soup).  Once that was done, I did a final seasoning and called it good.

We’ve been eating this as a taco filling with corn tortillas, fresh lime, cilantro, & a little jack cheese and it is awesome!  It’s also really good with eggs for sort of a huevos rancheros style breakfast.

Do you like to use a slow cooker?  What are your go-to recipes?