A couple of ideas for all that chile verde.

I mentioned in my last post that we’ve been using the chile verde I made for all sorts of things.  My husband and I often have a lot going on, so sometimes we don’t have time to do a ton of cooking.  Because of this, we often make up dishes that we can use throughout the week.  I thought I’d do a quick post to show you some options for chile verde (or other taco meat dishes like carnitas or barbaracoa).  First up?  Breakfast!

Breakfast: Chile Verde Huevos Rancheros

A love of breakfast totally runs in my family.  My dad makes awesome breakfasts and my sisters and I are all huge fans of the meal, especially when eggs are involved.  One of my favorite egg breakfasts is huevos rancheros.  This is basically just fried eggs (usually either sunny side up or over easy) put on tortillas and topped with salsa.  It is often served with a side of beans.  One reason this dish is so awesome is that you can dress it up or down using basically whatever you have on hand.  This morning i didn’t have beans, but I did have chile verde and some homemade tomato salsa.

Om nom nom.  Delicious!  Plus, this dish is super easy to make.  You literally just throw it together and eat it.  I topped my overeasy eggs with some chile verde, salsa, onion and cilantro, and devoured it with a couple of corn tortillas.  It took all of 5 minutes to make, making this a perfect weekday breakfast.  Add a side of black beans and a bloody mary, and you are in prime brunch territory.

Lunch: Taco Time!

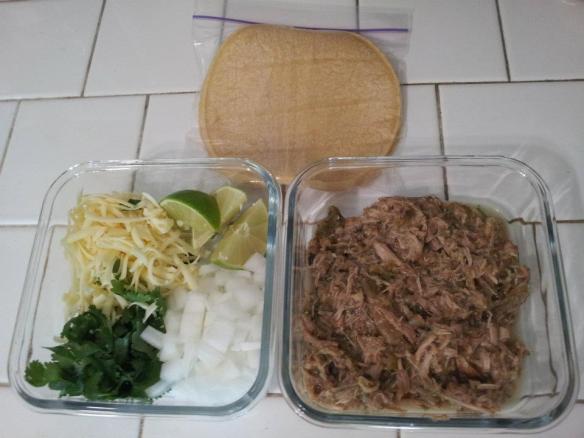
The difficult thing about street style tacos is that they pretty much have to be eaten right when they are made.  Otherwise the tortilla gets soggy and the onion just overpowers everything.  The solution?  Pack everything separately!

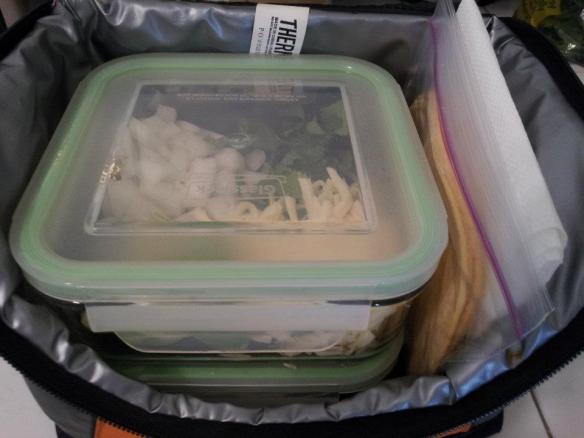
The toppings I like to use are chopped white onion, chopped cilantro, shredded jack cheese, and some fresh lime wedges.  Other options could be chopped fresh jalapenos, pico de gallo, etc.  We have glass containers with plastic lids that we use for lunches, but as long as you can microwave the container containing the pork (or you don’t mind munching on it cold), you could use whatever you have.  Another option that might work better for school kids or those who don’t have access to a microwave at lunch time is to pack the pork in a thermos so it stays hot.

The beauty of this system is that you can do it in a couple of ways.  You can make individual tacos and put the toppings on them as you eat them, or you can put the toppings onto the pork and eat it out of the container, using the tortillas more like a side.  You could also pack a larger flour tortilla and include some beans and/or rice and voila: burrito time!  The modular system is one of my favorite ways to pack lunches because it can be done ahead without things getting mushy.

If you have enough containers and/or room in your fridge, you could even pack several days worth and just fill your lunch box morning of.  Easy peasy.  Don’t forget to include a napkin and a fork!

Chilly Weather = Chile Weather!

Back in the day, I was a vegetarian for 6 or 7 years.  Then one day I was at a farmer’s market in Walla Walla, Washington with one of my best friends and she told me that she was eating the best thing she had ever tasted.  That thing was a freshly made pork sausage with sweet onions, all locally sourced.  I took a bite and declared that I was no longer a vegetarian.

My point is that if there was ever a reason for eating meat, it’s pork.  Pork is delicious!  It is also incredibly versatile, running the gamut from decadently fatty bacon (which I like to think of as the candy of meats) to lean and healthy tenderloin.  The tenderloin does get less healthy when you wrap it in bacon like I usually do, but that is beside the point.   I still eat vegetarian a good chunk of the time (because vegetables are awesome), but every once in a while pork really sounds good.  And by every once in a while I mean this week.

I had about 3.5 pounds of pork tenderloin in my freezer that needed to be used and when my husband said he was in the mood for Mexican food, I hit upon the perfect solution: chile verde.  Chile verde is basically a stew with pork, various peppers, garlic, and tomatillos.  It can be eaten straight up in stew form or used as a taco filling.  It is also a perfect slow cooker recipe.

I used this recipe from the Food Network as the basis for my chile verde, although I made a few alterations.  For one thing, I love the flavor of roasted chiles, so I roasted all the peppers along with the tomatillos.  I took before and after pictures of this but then accidentally deleted them from my camera.  Doh!  It was pretty straightforward, though.  I just cut all the peppers into chunks and threw them under the broiler on a sheet pan.  Another alteration I made was whirring the tomatillos in the food processor rather than chopping them.  Also, after I sauteed the vegetables I deglazed the pan with tequila.  Then everything went into the crock pot.

I set it for 3 hours on high, but you could also set it for ~6-8 hours on low and it would work fine.  At this point you could call it done and serve it as a stew.  We wanted it for tacos, however, so I strained out the solids using a colander.

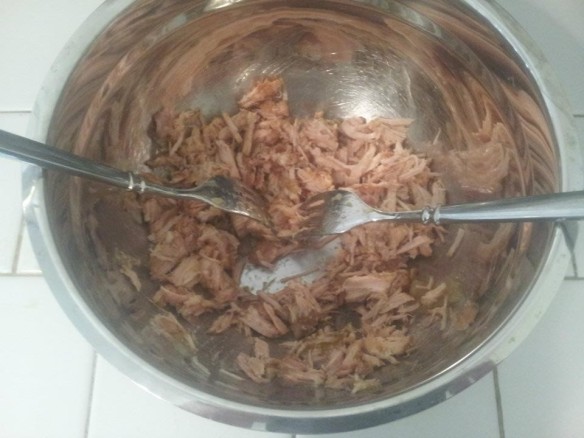
Then I pulled out all the pork pieces and shredded them using two forks.

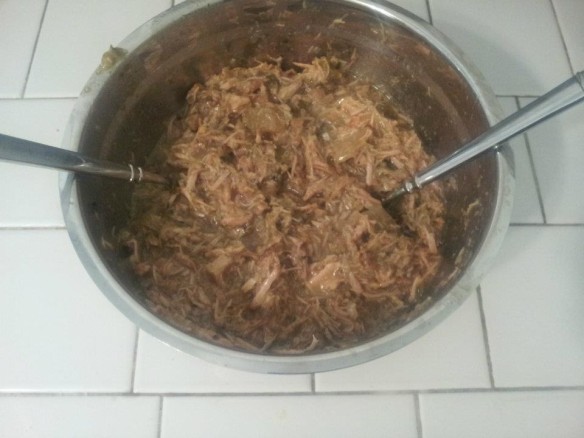
Once all the pork was shredded, the peppers and onions got added back in.  I also added a little of the broth to give it some moisture (I reserved the rest of the broth for tortilla soup).  Once that was done, I did a final seasoning and called it good.

We’ve been eating this as a taco filling with corn tortillas, fresh lime, cilantro, & a little jack cheese and it is awesome!  It’s also really good with eggs for sort of a huevos rancheros style breakfast.

Do you like to use a slow cooker?  What are your go-to recipes?

Well Cultured

After my success with cheesemaking yesterday, and in keeping with this month’s home dairy theme, I decided that I should also try my hand at making some yogurt.  My mom makes yogurt and yogurt cheese all the time and assured me that it was pretty darn easy, so I read a couple of tutorials about the process online, picked up some yogurt and a  heating pad from the store, and got to work.

Yogurt is made through a bacterial fermentation process.  The basic idea is that you heat the milk up to 185 °F, cool it down to 110 °F, then inoculate it with your yogurt bacteria and let it sit at that 110 °F temperature for 7 – 8 hours.  The initial heating kills any undesirable microbes and denatures the milk proteins so they’ll stick together rather than forming curds.  The long, warm fermentation is because that’s the temperature the bacteria like to ferment at.  The bacteria convert the lactose in the yogurt to lactic acid, the same acid that gives sauerkraut its flavor.  Microbiology is so cool!

The easiest way to inoculate yogurt is to add some existing live culture yogurt to your warm milk.  I added about a tablespoon and a half of Nancy’s whole milk plain yogurt to get things started, then turned on the heating pad and let it go.  Then I discovered something about this heating pad.  It has a 2 hour automatic shutoff.  I’m sure that that is a vitally important safety feature when people are using it in their bed, but when it’s in my kitchen and I have better things to do than come by every two hours to turn the damn thing back on, it is irritating.  It also lost about an hour of good heating time, so it took longer.  Boo!

Once the yogurt firmed up a bit, I stirred it and poured it into a couple of containers, then stuck them in the fridge.  I tried the yogurt tonight and it is pretty tasty, but a little on the thin side (I blame the heating pad!).  My mom suggested putting it through a yogurt strainer, which I may try.  I’m also wondering if I should just heat it up again and let the bacteria keep doing their thing.

Oh well.  In the mean time, it is delicious with a drizzle of maple syrup!  Not bad for a first attempt.

Blessed are the Cheesemakers

This month’s UFH Challenge is home dairy!  Now, if you know me, you know that I love cheese.  And we’re not talking about some brief affair that fizzles with time.  If I could marry a dairy product, I might marry cheese (apologies to my husband).  The first challenge is indeed cheese making and is posted over at the Eating Rules blog.  It involves starting off with a simple ricotta-like farmers cheese, using lemon juice for the acid.  While I really want to get my hands on some mozzarella one of these days for some awesome homemade pizza, this seems like a good place to start.

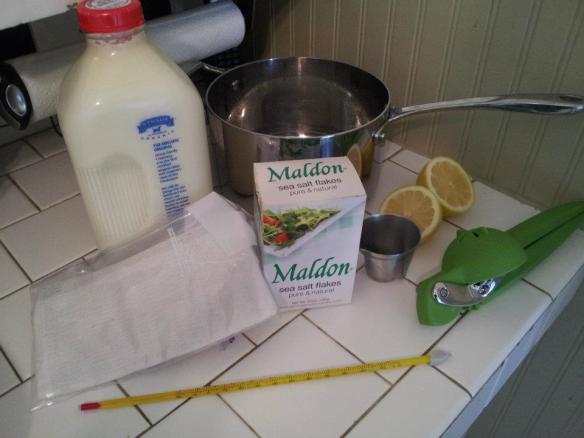
The equipment listed is as follows:

  • A good pot. Already in the pantry.  Excellent!  Off to a good start.
  • A dairy thermometer.  Let me take a little aside here to lament how much trouble I have had finding kitchen thermometers.  I have tried analog, electric, praying to the candy thermometer gods, etc. and have still yet to find one that doesn’t read COMPLETELY wrong.  Usually it reads way too high, so I end up freaking out and taking the candy I’m trying to make off of the stove thinking it’s ruined and then it doesn’t set because it didn’t get freaking hot enough.  Thermometers are the bane of my existence.  OK, back to the point.  I was going to pick up a dedicated dairy thermometer but our local cheese supply store (yes, we have one of those.  Haven’t you seen Portlandia?) is closed on Mondays and so I opted to use our brewing thermometer, which has the right range.  It doesn’t clip to the side of the pot but I figure I can deal with holding it for my first cheese attempt.  Also it is one of the more accurate thermometers I’ve used.
  • Cheesecloth or Butter Muslin.  Again, already in the pantry.  This is cake!  Err…cheese!
  • Slotted Spoon, Measuring Cups, and Measuring Spoons. Check, check, and check.

I didn’t need to buy any equipment!  Not bad for trying a whole new food making process.  Ingredients are simple as well:

  • 1/2 Gallon Whole Milk.  This should not be ultra-pasteurized and I have a fondness for non-homogenized.  I went to our local co-op hoping to find some locally sourced milk but their options were sadly limited.  I ended up buying some Strauss (which is darn good, but unfortunately from California).  Then when I was at New Seasons I found local milk for cheaper.  Damn you co-op!  Oh well, next time.  And it was really only 50 cents difference.  Next time I will go to New Seasons first.  Alternatively, I will actually make the time to drive back via the Valley and got to Kookoolan Farms, where I can get raw milk.
  • 1/4 to 1/2 Cup Lemon Juice (Another way to use my lemons!  Kismet!)
  • 1/2 tsp Cheese Salt (My first thought was,  “What the heck is cheese salt?”.  My second thought was, “Thank you, internet!”.  Apparently it’s flaky, non-iodized salt.  Unfortunately with our cheese making shop closed, I couldn’t get any.  Then I realized we had Maldon Salt, which is flaky, non-iodized sea salt.  Score!
  • Chopped Herbs (Alright herb garden!  Glad it’s been a mild winter.)

So really I already had everything I needed except for the milk.  So far, this experiment into cheese making was rockin’!

The first step is heating the milk to 175 °F.  The challenge post said to do this on the stovetop, but I figured a double boiler method would be more forgiving in terms of not accidentally burning the milk, so I went with that.  I boiled water in our stockpot and used that to sanitize the milk pan, the thermometer, and the spoon I’d be using to stir the milk.  Then I put the milk pan into the stockpot and poured the milk into it.  The downside of using non-homogenized milk is that the cream at the top can prevent the milk from coming out, but I poked at it with a knife until it was enough mixed in to at least come out of the bottle.

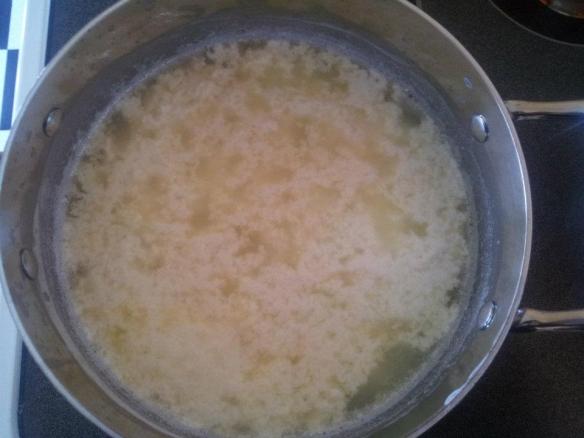
I stirred the milk and held the thermometer in it until it reached 175 °F, then took it out of the water bath and added the lemon juice.  Fifteen minutes later, sure enough, I had curds and whey!  I felt a little like Miss Muffet.

These got put through a cheesecloth-lined colander to drain them then hung up to drain further over the sink.  We consider binder clips to be essential kitchen items for instances just such as these.

After a couple of hours, I emptied the curds into a bowl, mixed in 1/2 tsp of salt and some chopped oregano from our garden and voila!  Cheese!

It tastes really good, too.  The lemon imparts a slight tanginess and the oregano adds some complexity.  I can’t wait to try this with some fresh bread.  Assuming it lasts long enough for me to make some bread.  I may just eat it all on its own before that happens.  Also, I bet this would make AMAZING blintzes.  The next time I make it, I think I may have to channel my grandmother and roll some of those.  Yum!

When life hands you lemons…

OK, so you know how on Friday I said that I had a ton of meyer lemons I needed to use?  Well, the scones really only took one plus the zest from a couple of more.  I still had a bunch of lemons.

My next thought was lemon bars.  They are tasty, easy, and brightly lemony.  Plus since our chickens started laying again last week, we have plenty of eggs to use.  So that’s what I did.

First the shortbread crust gets made and pressed into the pan.  This is really just flour, powdered sugar, and butter, but somehow it works:

Bake that for ~20 minutes and you get your shortbread crust.

On top of that, put the custard mixture (eggs, lemon, sugar, etc.)

Bake that for another 15 -18 minutes, then let cool and dust with powdered sugar!  Voila.  Lemon bars.  These are insanely good.  Like, so good that we had friends over on Friday night and didn’t eat any until they got there and the next morning there was only one left.  Om nom nom.

Unfortunately we still had a bunch of lemons after that.  So I did what people everywhere do when life hands them lemons:

Meyer Lemon Bar recipe here.

Like a Rolling Scone

I got up this morning with every intention of tackling the mess that is currently our basement, especially with my seeds coming soon!  I want to get the table I’ll be using for seed starts all ready to go.  Instead, however, I decided to make pizza dough and try out a new blueberry lemon scone recipe since I had both blueberries and meyer lemons sitting around needing to be used.

Posts on the pizza and the basement will come later, but I thought I’d share the scone recipe since I’ve already eaten two of them.  Oops.

I did some searching around and ended up mashing a couple of different scone recipes together to suit my needs.  Here’s what I ended up with:

Glazed Blueberry & Meyer Lemon Scones (adapted from Tyler Florence)

Ingredients

Blueberry Scones:

  • 2 cups all-purpose flour
  • 1 tablespoon baking powder
  • 1/2 teaspoon salt
  • 1/3 cup sugar
  • Zest from two lemons
  • 3 tablespoons unsalted butter, cold, cut in chunks
  • 1 cup fresh blueberries
  • 1 cup heavy cream, plus more for brushing the scones
  • 1 egg yolk, slightly beaten
  • 1/2 teaspoon vanilla extract

Lemon Glaze:

  • Juice from one lemon
  • 1 cups confectioners’ sugar, sifted
  • 2 tablespoons heavy cream
  • Zest from one lemon

Directions

Preheat the oven to 400 degrees F.

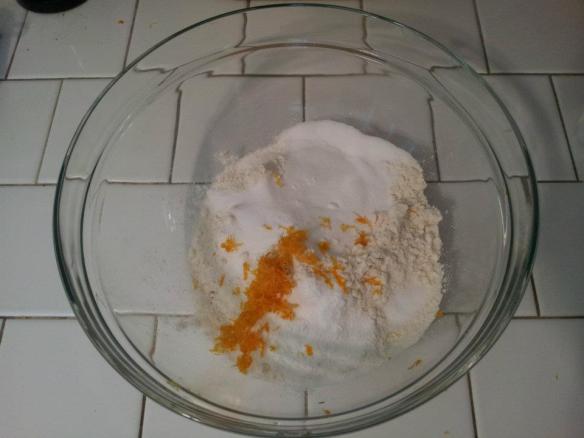
Sift together the dry ingredients; the flour, baking powder, salt, and sugar. Add the lemon zest and mix.

Using 2 forks, a pastry blender, or your hands, cut in the butter to coat the pieces with the flour. The mixture should look like coarse crumbs. Add the egg yolk and vanilla extract to the cream.  Make a well in the center of the dry ingredients and pour in the cream mixture. Fold everything together just to incorporate; do not overwork the dough.  Mix in the blueberries, taking care not to mash them (unless you want purple scones!).

Press the dough out on a lightly floured surface into a flat circle, approximately 8 inches in diameter.  Cut the circle into 8 even wedges.  Place the scones on a parchment-lined cookie sheet and brush the tops with a little heavy cream.

Bake for 15 to 20 minutes until beautiful and brown.

While the scones are baking, make the glaze by mixing all the ingredients together in a bowl.  Let the scones cool a bit before you apply the glaze or it will be runny.  I highly recommend doing this over a plate, as well, so that you don’t get glaze everywhere.

Enjoy!

Sauerkraut: The Reckoning

So I mentioned a couple of weeks ago that I started some sauerkraut.  Well, it’s been long enough for it to start fermenting, and it sure smells like sauerkraut, so that can only mean one thing: taste test time!

As it’s fermenting in its food grade bucket, the sauerkraut stays covered by a cloth to prevent dust and whatnot from getting in there.  That means that after I hauled it up from the basement yesterday, it looked like this:

“What’s with the weird shape of your bucket?” you might ask. You need to weight the sauerkraut down with something to keep it under the surface of the brine.  Actual sauerkraut crocks have a fancy lid that fits down in it, like so:

Alas, I am cheap and we had a food grade bucket on hand, so we made do with an old plate and a growler full of water.

You can’t really see the plate there, but it’s under the surface of the brine.  Actually, the first plate I tried was too big since the bucket is slightly tapered, so I had to rescue a different one from under a houseplant and give it a thorough scrubbing…but I digress.

The beauty of sauerkraut is that you can take a bowlful out and then weight the rest back down and let it keep fermenting.  This allows you to taste it throughout the fermentation and determine when it is at optimal deliciousness, and that is just what I did.

The verdict?  It’s pretty tasty but still needs some fermentation time to become full on finished sauerkraut.  It still had a fair amount of crunch and some of the cabbage spice.  That did not, however, stop me from downing the entire bowl last night after I got home.

I have to say, the whole thing has been remarkably easy–who knew cabbage and salt was all you needed!?  I will continue sampling this kraut over the next few weeks, but next time I think I will make sure to have some bratwurst on hand!  If you’re interested in trying it for yourself, I got the recipe from the Wild Fermentation website.

Have you tried making sauerkraut?  How did yours turn out?